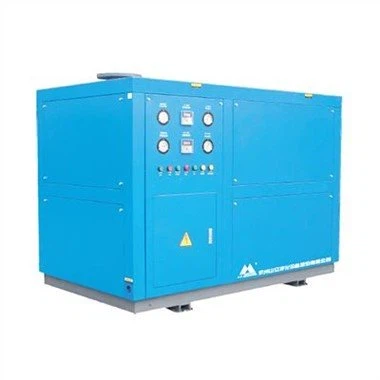
Checking and adjusting the refrigerant charge in a water chiller unit is a critical maintenance task that ensures optimal performance, energy efficiency, and longevity of the system. As a leading water chiller unit supplier, we understand the importance of proper refrigerant management and are here to guide you through the process.

Why is Refrigerant Charge Important?
Refrigerant is the lifeblood of a water chiller unit. It absorbs heat from the water or air being cooled and transfers it to the outside environment. The correct refrigerant charge is essential for the chiller to operate efficiently. An undercharged system may lead to reduced cooling capacity, increased energy consumption, and potential compressor damage. On the other hand, an overcharged system can cause high pressures, reduced efficiency, and may also damage the compressor and other components.
Tools and Equipment Needed
Before you start checking and adjusting the refrigerant charge, you'll need the following tools and equipment:
- Refrigerant manifold gauge set: This set allows you to measure the pressure of the refrigerant in the high and low sides of the system.
- Temperature probes: Used to measure the temperature of the refrigerant at various points in the system.
- Scale: To accurately measure the amount of refrigerant added or removed.
- Leak detector: To check for refrigerant leaks in the system.
Step 1: Safety First
Working with refrigerants can be dangerous, so it's crucial to follow safety precautions. Wear appropriate personal protective equipment (PPE), including safety glasses, gloves, and a respirator if necessary. Make sure the chiller unit is turned off and the power supply is disconnected before starting any work.
Step 2: Gather System Information
Before checking the refrigerant charge, gather information about the water chiller unit. This includes the model and serial number, the type of refrigerant used, and the manufacturer's recommended refrigerant charge. You can usually find this information on the unit's nameplate or in the owner's manual.
Step 3: Check for Leaks
Use a leak detector to check for refrigerant leaks in the system. Look for signs of oil stains or bubbles around the refrigerant lines, fittings, and components. If you detect a leak, repair it before proceeding with the refrigerant charge check.
Step 4: Measure the Pressure and Temperature
Connect the refrigerant manifold gauge set to the high and low-pressure ports on the chiller unit. Use temperature probes to measure the temperature of the refrigerant at the evaporator and condenser. Record the pressure and temperature readings.
Step 5: Calculate the Superheat and Subcooling
Superheat and subcooling are important parameters that indicate the refrigerant charge in the system. Superheat is the difference between the actual temperature of the refrigerant vapor at the evaporator outlet and its saturation temperature at the measured pressure. Subcooling is the difference between the saturation temperature of the refrigerant liquid at the measured pressure and its actual temperature at the condenser outlet.
To calculate the superheat and subcooling, you'll need to refer to the refrigerant pressure-temperature chart for the specific refrigerant used in the system. Compare your calculated values with the manufacturer's recommended values. If the superheat is too high, it may indicate an undercharged system. If the subcooling is too high, it may indicate an overcharged system.
Step 6: Adjust the Refrigerant Charge
If the superheat or subcooling values are outside the recommended range, you'll need to adjust the refrigerant charge. To add refrigerant, connect a refrigerant cylinder to the low-pressure port on the chiller unit using a charging hose. Slowly open the valve on the refrigerant cylinder and add refrigerant in small increments. Use the scale to measure the amount of refrigerant added.
To remove refrigerant, connect the refrigerant recovery unit to the high-pressure port on the chiller unit. Follow the manufacturer's instructions for operating the recovery unit to safely remove the excess refrigerant.
After adding or removing refrigerant, repeat steps 4 and 5 to measure the pressure, temperature, superheat, and subcooling. Continue adjusting the refrigerant charge until the values are within the recommended range.
Step 7: Final Checks
Once you've adjusted the refrigerant charge, perform a final check of the system. Check the pressure and temperature readings again to ensure they are stable. Look for any signs of leaks or abnormal operation. Start the chiller unit and monitor its performance for a few hours to make sure it's operating properly.
Tips for Maintaining the Correct Refrigerant Charge
- Regularly inspect the water chiller unit for refrigerant leaks.
- Keep the chiller unit clean and free of debris to ensure proper airflow and heat transfer.
- Follow the manufacturer's recommended maintenance schedule for the chiller unit.
- Train your staff on proper refrigerant handling and safety procedures.
Conclusion
Checking and adjusting the refrigerant charge in a water chiller unit is a complex but essential task. By following the steps outlined in this blog post, you can ensure that your water chiller unit operates efficiently and reliably. If you have any questions or need further assistance, please don't hesitate to [contact us for a purchase consultation]. We are a trusted [Water Chiller Unit Supplier], offering a wide range of high-quality water chiller solutions, including Benchtop Water Chiller, Water Cooled Chiller System, and Chilled Water Cooling System.
References
- ASHRAE Handbook - Refrigeration. American Society of Heating, Refrigerating and Air-Conditioning Engineers.
- Manufacturer's manuals for water chiller units.